How to Code Sign and Notarize .NET Console App for Mac

Build, Notarize and Sign .NET console application for Mac OS
Published on June 02, 2021 by Coding Flamingo
MacOS CI/CD Build pipeline Sign Notarize Build
5 min READ
Since the introduction of MacOS BigSur, Apple requires all software that runs on a Mac to be signed by a certificate from a developer in their developer program and notarized. In this blog we will go through how to do this for a .NET Console application.
Video Version
Text Version
Pre-requisites
- Have an apple developer account.
- Have a Mac (this is just of the setup, if you don’t have one borrow one from a friend)
- Your .NET Console App in a GitHub Repo.
Creating the Apple Developer Certificate
First thing we have to do is create your apple developer certificate.
- Open Keychain on your Mac
- On the top left Menu Select: Keychain Access > Certificate Assistant > Request a Certificate from a Certificate Authority.

- Enter the information for the Certificate. 1) your email address, 2) the certificate Subject name (usually the name of your company or of your application) 3) your email address.
- Select the save to disk radio button
- Click continue to create the CSR (Certificate Sigining Request)
- In the browser, login to your developer account.
- Click on Certificates, identifiers and profiles.
- Click on create new certificate.
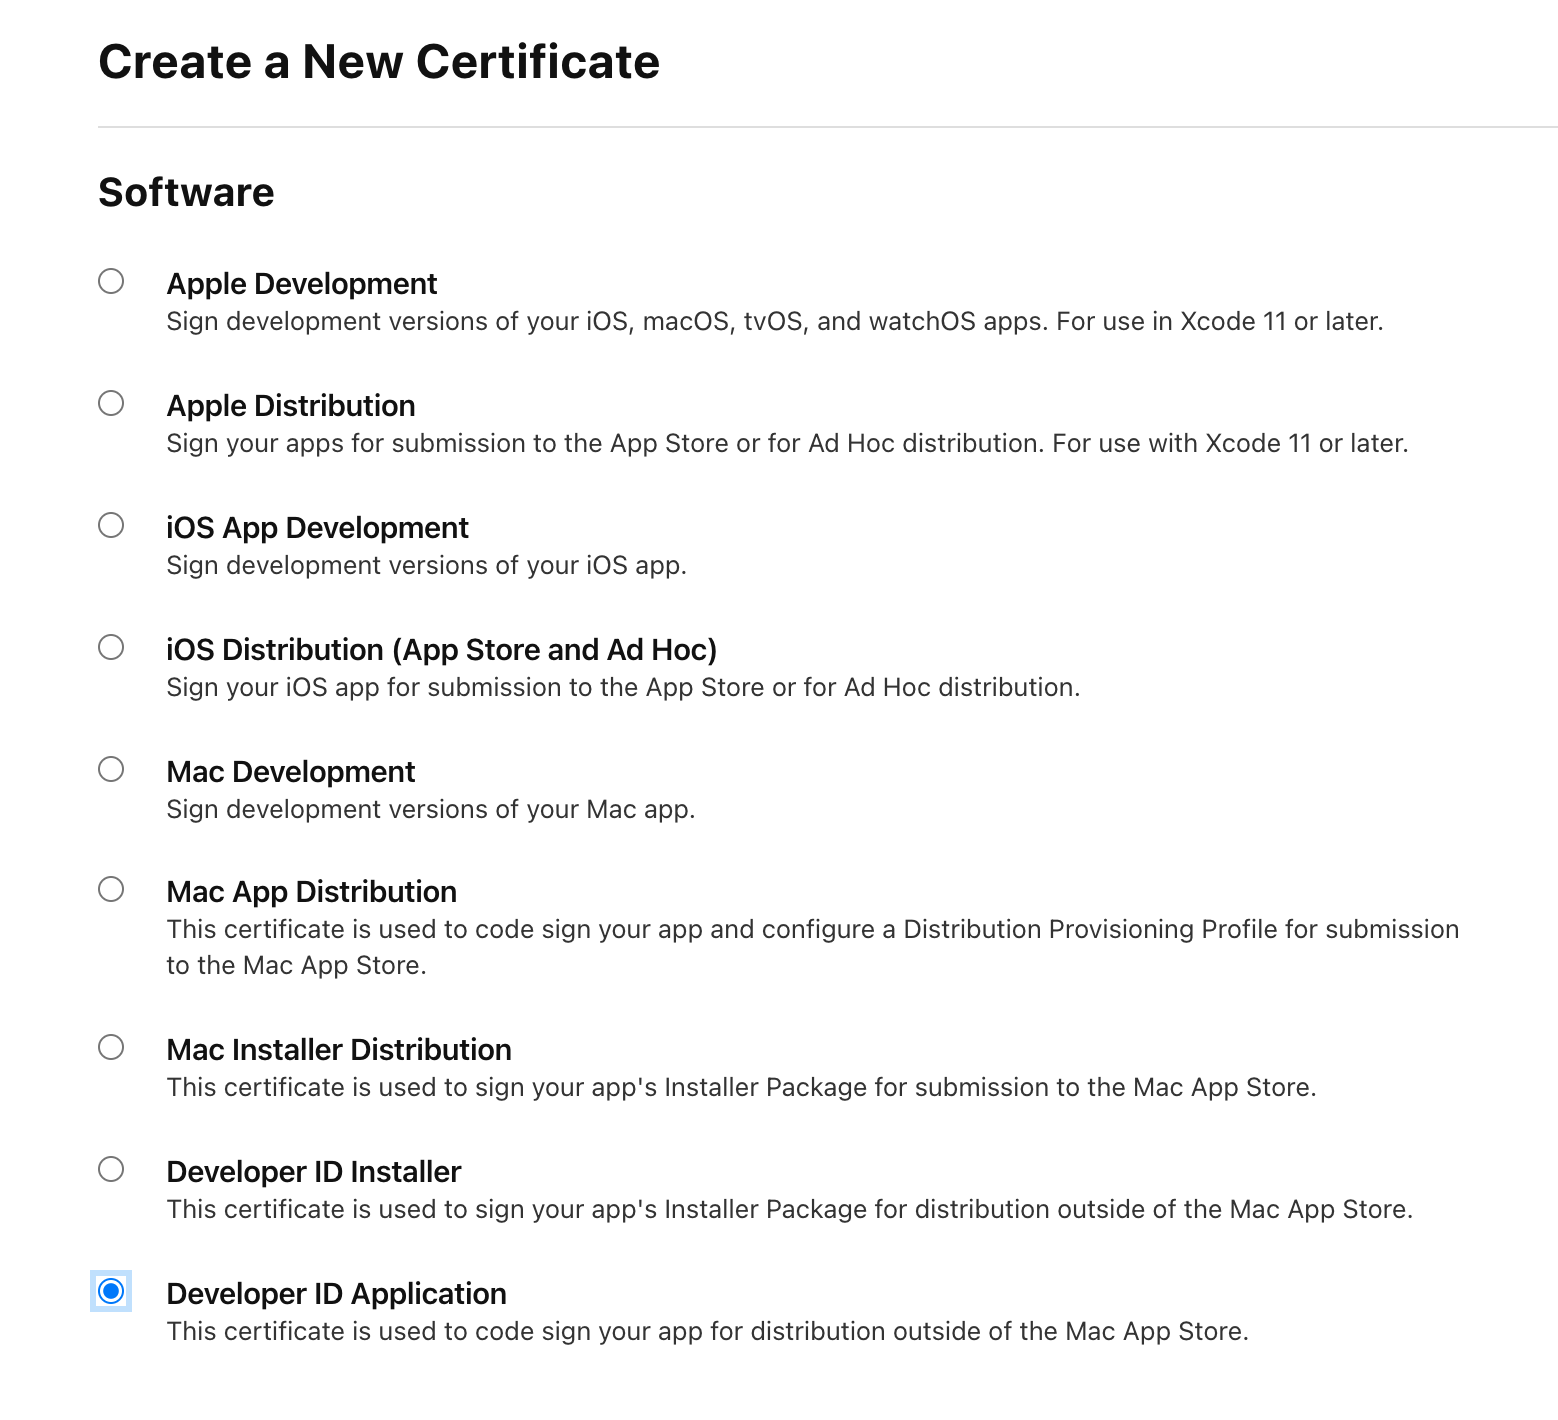
- Select Developer ID Application and click continue.
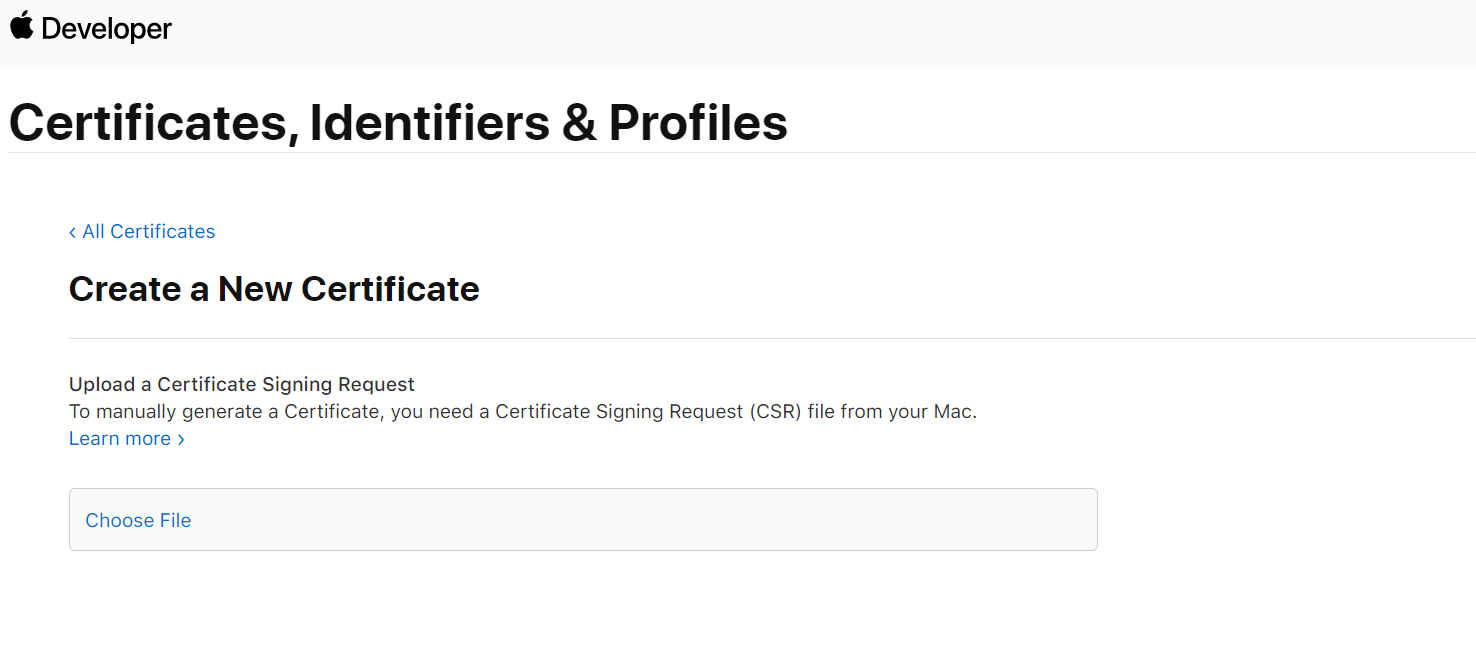
- Upload the CSR.
Installing the Certificate
- Download the create certificate.
- Install it by clicking on it and following the prompts.
- This should add it to your Keychain Access under Login.
- Export the Certificate by right clicking on it in the keychain access and select export.
- Select the .p12 file type.
- This will promt you for a password. Select a long and secure password and save it somewhere safe. we are going to use it later.
- Open Terminal in your Mac.
- Navigate to the folder where you saved the file.
- Run the following command to export it as a base64:
base64 YOURCERTFILENAME.p12 - This will output the certificate in a base 64 string.
Adding the Certificate to GitHub Actions
- Login to Github and go to your Repo
- Click on the Settings Menu

- Click on Secrets.
- Click on New Repository Secret.
- Name it “MAC_CERT_BASE64” and paste the base64 output of the certificate.
- Save the Secret
- Click on New Repository Secret.
- Name it “MAC_CERT_PASSWORD” and enter the password you created when exporting the certificate.
- By now it should look like this:

- Leave this tab open, we will use it later.
Creating an App Specific Password
Your Apple Developer account has MFA, so we have create a password for the GitHub action to use to notarize the application.
- Go to https://appleid.apple.com/ and login.
- In in the account management page, go to the security section, and create an App Specific password.
- Copy the password generated.
- Go Back to the GitHub Tab.
- Click on New Repository Secret.
- Name it “MAC_DEV_PASSWORD” and enter the password you created.
- By now it should look like this:

Creating the GitHub Action
TL;DR here is the GitHub Action, you are going to need this script + this file to sign and this script to notarize.
GitHub Action File
This Action Has to Run on MacOS NOTE: MacOS GitHub action minutes cost 10x regular minutes.
We also have to use dotnet 6. It is the only one that supports notarizing for MacOS. (this blog was written before it was GA, so the include-prerelease has to set to true.
name: MAC Signing

on:
  workflow_dispatch:

jobs:
  build:
    runs-on: macos-latest

    steps:
    - uses: actions/checkout@v2

    - name: Set up .NET Core
      uses: actions/setup-dotnet@v1
      with:
        dotnet-version: '6.0.x'
        include-prerelease: true
we then run dotnet publish for Mac OS where “ConsoleApp1/ConsoleApp1.csproj” is the path to your csproj.
Note we are running this for osx-x64 you can change this for the new arm machines as well
    - name: dotnet publish
      run: dotnet publish ConsoleApp1/ConsoleApp1.csproj -c Release -r osx-x64 -p:UseAppHost=true -p:PublishSingleFile=true --self-contained true -p:PublishReadyToRunShowWarnings=true  -o $/consoleapp
Note: we set the output of the publish to $/consoleapp
now we delete the .pdb files, since they are not used.
    - name: delete .pdb
      run: rm $/consoleapp/*.pdb
Then we make the console application file executable by runinning where “ConsoleApp1” is your file name.
    - name: chmod
      run: chmod +x $/consoleapp/ConsoleApp1
Now we have to add the certificate to the keychain to use it to sign the application.
    - name: Add Cert to Keychain
      uses: apple-actions/import-codesign-certs@v1
      with:
        p12-file-base64: $
        p12-password: $
Then we run this signing script passing the following variables:
- RunFile “./consoleapp/ConsoleApp1”
- Directory ./consoleapp/*
- Your Certificate name “Developer ID Application: YOURORG (YOURDEVID)”
- Your Entitlements file, you can find a sample one with the minimum required things for dotnet here ./entitlements.plist
    - name: Sign Binaries
      run: "sh BuildAndReleaseScripts/SignMac.sh \"$/consoleapp/ConsoleApp1\" \"$/consoleapp/*\" \"Developer ID Application: CodingFlamingo (HVPR40Y9IG)\" \"BuildAndReleaseScripts/entitlements.plist\""
Then we have to zip the folder to send it to Apple to notarize it:
- name: Zip Binary for Notarizing
      run: zip -rj consoleapp.zip $/consoleapp/*
Then we send it to Apple to get notarized with this script passing the following variables:
- dev_account the email you use for your apple ID
- dev_Password the apple password we created for you account and saved in the GitHub secrets. “$”
- The group ID you created for your application in Apple Dev account $3 “group.com.company”
- dev_team This is the Dev ID (it is in parenthesis in your certificate name) DEVID
- FileName the file we just zipped in the previous step. ./filename.zip
    - name: Notarize Binaries
      run: "sh BuildAndReleaseScripts/Notarize.sh \"codingflamingo@gmail.com\" \"$\" \"group.com.codingflamingo\" \"HVPR40Y9IG\" \"./consoleapp.zip\""
Finally we upload the artifacts.
    - name: Upload artifact for deployment job
      uses: actions\upload-artifact@v2
      with:
        name: MyConsoleApp-MacOS
        path: $/consoleapp
And that is how you Build, Sign, and Notarize .NET console app for MacOS.
Comments
No comments found for this article.
Join the discussion for this article by commenting in this ticket. Comments appear on this page instantly.